


In a world where home security is becoming increasingly vital, creating your own Arduino alarm system offers a blend of practicality and creativity. With rising concerns about safety, having a reliable alarm system can provide peace of mind. But why buy a pre-made system when you can build one yourself? This project not only enhances your home security but also allows you to dive into the exciting realm of electronics and programming.
Building an Arduino alarm system is easier than you might think. This guide will walk you through each step, from gathering materials to programming your device. You’ll discover how to connect sensors, customize alerts, and even troubleshoot common issues. Whether you’re a seasoned DIY enthusiast or a curious beginner, this project opens the door to endless possibilities in home automation. So, roll up your sleeves, and let’s get started on securing your space while having some fun along the way!
What You’ll Need
Building your own Arduino alarm system can be an exciting and rewarding project, but to get started, you’ll need a few essential materials. First and foremost, you’ll need an Arduino board—an Arduino Uno is a popular choice for beginners due to its user-friendly interface and extensive community support. Alongside the board, gather a breadboard and jumper wires for easy connections. You’ll also require various sensors: a PIR motion sensor for detecting movement, magnetic door/window sensors for perimeter security, and a buzzer or siren to alert you when a breach occurs. If you want to take it a step further, consider adding an LCD display or LED lights for visual notifications.
In addition to the hardware components, having the right tools can make your DIY security system project much smoother. A multimeter is invaluable for checking connections and ensuring everything is wired correctly. Tweezers and wire strippers can help with handling small components and making precise cuts. As for software, you’ll need the Arduino IDE, which is free to download and provides the necessary environment for coding your alarm system. It’s also beneficial to install libraries that correspond to your chosen sensors, as these will simplify programming and allow you to leverage pre-written code snippets.
To get the most out of your project, consider investing in some additional accessories. A power supply (like a battery pack or AC adapter) will keep your system running continuously, while a Wi-Fi module like the ESP8266 can enable remote access and notifications via your smartphone. This way, you can enhance your Arduino alarm system’s functionality and turn it into a more comprehensive DIY security system that meets your personal needs.
Lastly, don’t forget about the documentation! Having access to online tutorials and forums can provide you with troubleshooting tips and coding examples tailored to your specific setup. Engaging with the Arduino community through platforms like GitHub or Reddit can open up new ideas and solutions that could enhance your project even further. With the right materials, tools, and resources at your disposal, you’re well on your way to creating a reliable and effective alarm system for your home.
Setting Up Your Arduino
Once you’ve gathered all the necessary components for your Arduino alarm system, it’s time to dive into the setup process. The first step is connecting your Arduino board to your computer using a USB cable. This connection not only powers the board but also allows you to upload code directly from your computer. After connecting, make sure to install the Arduino IDE (Integrated Development Environment) if you haven’t done so yet. This software is essential for writing and uploading your code to the board. You can download it from the official Arduino website, which provides versions compatible with Windows, macOS, and Linux.
Next, you’ll need to install specific libraries that will enable your Arduino to communicate with the sensors you plan to use. For instance, if you’re incorporating a motion detection sensor like the PIR (Passive Infrared Sensor), you may want to install the relevant library that simplifies sensor integration. To do this, open the Arduino IDE, navigate to “Sketch,” then “Include Library,” and finally “Manage Libraries.” In the Library Manager, search for your desired library and click “Install.” This process ensures that your Arduino can interpret data from the sensors correctly and respond accordingly.
After installing the necessary libraries, it’s time to connect your sensors to the Arduino board. Start by plugging in your motion detection sensor; usually, these have three pins: VCC (power), GND (ground), and OUT (signal). Connect VCC to the 5V pin on the Arduino, GND to a ground pin, and OUT to one of the digital pins—say, pin 2. Ensure that all connections are secure and well-organized; messy wiring can lead to confusion later on. As a tip, consider labeling your wires or using colored ones to differentiate between power and signal connections easily.
With everything connected and libraries installed, you’re ready to start programming your Arduino! This foundational setup is crucial for ensuring that your alarm system will function as intended. By following these steps carefully, you’ll establish a solid base for adding features like alerts for motion detection or notifications sent straight to your phone when unexpected movement is detected. So let’s move forward and get coding!
Choosing the Right Sensors
When building your Arduino alarm system, selecting the appropriate sensors is crucial to ensure effective security monitoring. There are several types of sensors you can incorporate into your electronics project, each with distinct functionalities. The most common types include motion sensors, door/window sensors, and vibration sensors. Motion sensors detect movement within a defined range, while door/window sensors alert you when a door or window is opened. Understanding the characteristics of these sensors will help you design a more reliable alarm system tailored to your needs.
Motion sensors, particularly passive infrared (PIR) sensors, are popular choices for detecting intruders in large areas. They work by sensing changes in infrared radiation emitted by objects, making them highly effective for outdoor surveillance or open spaces. However, they do have some limitations; for instance, they may trigger false alarms due to pets or passing vehicles. On the other hand, door and window sensors are typically magnetic and consist of two parts: one on the door or window and another on the frame. When the door or window opens, the magnetic field is disrupted, triggering the alarm. While these sensors are less likely to produce false alarms, they require installation on every entry point, which can be time-consuming and may not cover larger areas effectively.
To achieve optimal security, many DIY enthusiasts choose to combine both motion and door/window sensors in their Arduino alarm system. This hybrid approach capitalizes on the strengths of each sensor type while mitigating their weaknesses. For example, using motion sensors in conjunction with door/window sensors allows you to monitor both entry points and movement within a space. Additionally, integrating multiple sensor types can enhance your overall security framework by providing overlapping coverage.
Ultimately, the decision on which sensors to use will depend on your specific security needs and the layout of your home or workspace. Consider factors like the size of the area you want to protect, the number of entry points, and whether you have pets that might trigger motion sensors. By thoughtfully selecting and combining different types of sensors, you’ll create a robust Arduino alarm system that effectively safeguards your environment while also providing peace of mind.
Wiring Your Components
Wiring your components correctly is crucial for the success of your Arduino alarm system. A detailed wiring diagram will serve as your best friend in this stage, helping you visualize how each sensor connects to the Arduino board. For example, if you’re using a PIR motion sensor, you’ll typically connect the output pin to one of the digital pins on the Arduino, while the power and ground pins will connect to the appropriate voltage and ground rails. Similarly, door/window sensors usually require a different setup, often involving magnet contacts that complete a circuit when the door or window is closed. Ensuring you follow the wiring diagram accurately can prevent confusion and errors during programming.
To keep your project organized, consider tidying up your workspace before diving into the wiring process. A clutter-free area not only helps in maintaining focus but also reduces the risk of misplacing components or tools. Use labeled containers for screws and small parts and have your tools within easy reach. Additionally, color-coded jumper wires can significantly ease the wiring process. For instance, use red wires for power connections and black for ground; this simple system allows you to trace connections quickly, which is especially handy when debugging or making adjustments later on.
As you wire your components, it’s also essential to double-check each connection before powering up your Arduino. A common mistake is accidentally connecting sensors to the wrong pins, leading to malfunctioning or unresponsive systems. Make it a habit to go through each wire and ensure it’s firmly connected. If you’re working with a breadboard, take care to align the sensors properly and utilize short jumper wires to minimize clutter. This attention to detail will pay off when you begin programming your system, as a well-organized setup can help troubleshoot issues more efficiently.
Ultimately, a solid foundation in wiring will not only enhance the functionality of your Arduino alarm system but also build your confidence in tackling more complex electronics projects in the future. With everything connected correctly, you’ll be ready to transition smoothly into the programming phase, where you can bring your alarm system to life with custom alerts and notifications.
Programming the Alarm System
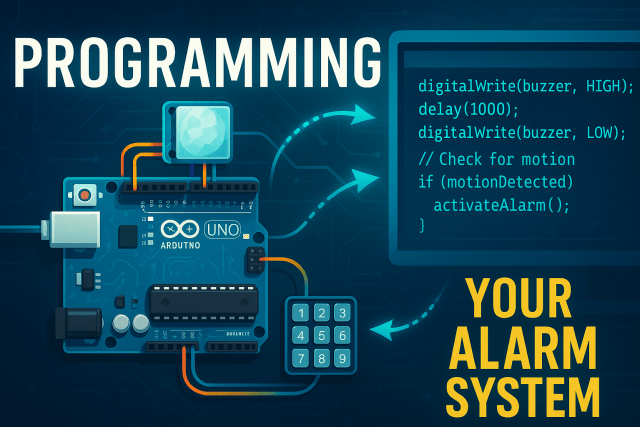
Once you’ve successfully wired your components, it’s time to dive into the exciting world of programming your Arduino alarm system. At its core, the code for your alarm system will consist of a few key elements: sensor input, conditional statements, and output actions. Using the Arduino IDE (Integrated Development Environment), you’ll start by defining the pins connected to your sensors and setting up any necessary libraries for functionality, such as the “Servo” library if you’re using a servo motor for a physical alert mechanism.
A basic structure of your program might look something like this: first, initialize the variables and set the pin modes in the `setup()` function. Next, within the `loop()` function, you’ll continuously monitor your sensors for any signs of intrusion. If a motion sensor is triggered or a door/window sensor detects an opening, you can initiate an alert. This is where you can get creative! For example, you can program your Arduino to sound a buzzer, flash an LED light, or even send notifications to your smartphone via a Wi-Fi module like the ESP8266.
To customize alerts and notifications for your phone, you’ll need to integrate a notification service. One popular method is to use IFTTT (If This Then That) along with a web request from your Arduino. By setting up an IFTTT applet that sends a notification to your smartphone whenever a specific trigger occurs (like a sensor activation), you can ensure that you’re always aware of potential threats. With just a few lines of code, you can set up an HTTP request that communicates with IFTTT’s webhook, allowing you to receive real-time alerts directly on your device.
Programming your Arduino alarm system not only enhances its functionality but also gives you the opportunity to personalize it to fit your security needs. Whether you want simple beeping alerts or complex smartphone notifications, mastering this coding aspect opens up a world of possibilities for DIY enthusiasts and tech beginners alike. So grab your laptop, fire up the Arduino IDE, and let’s get coding!
Testing Your System
Once you’ve programmed your Arduino alarm system, it’s time to put it to the test. This phase is crucial to ensure that everything is functioning correctly before you rely on it for home security. Begin by checking all connections and power supply to confirm that everything is properly wired and powered up. A common issue beginners might encounter is a loose wire or incorrect pin connection. Take the time to review your wiring against the diagram you followed earlier; this simple step can save you hours of troubleshooting later.
To simulate a breach and ensure your alarm system is responsive, you can use various methods depending on the sensors you’ve implemented. For motion sensors, walk in front of them to see if they trigger the alarm as expected. If you’re using door or window sensors, simply open one while monitoring the Arduino’s output—this will help you verify that the alarm activates correctly. If the system fails to respond, check the sensor’s positioning and sensitivity settings in your code, as these parameters can significantly affect performance.
If you encounter any issues during testing, don’t panic! Start by isolating the problem. For instance, if your alarm isn’t sounding, check the buzzer connection and ensure that the correct pin is being used in your code. Additionally, utilizing debugging tools within the Arduino IDE can help you track down errors in your programming logic. Remember, this process is beginner-friendly, and many enthusiasts face similar challenges; documenting your troubleshooting steps can also be beneficial for future projects.
Finally, consider running a series of tests over a few days to gauge reliability. This not only builds confidence in your system but allows you to catch any intermittent issues that may not show up during initial tests. By taking these steps, you’ll ensure that your Arduino alarm system is not just functional but also robust enough to protect your home effectively. Happy testing!
Enhancements and Customizations
Once you’ve successfully built your Arduino alarm system, it’s time to take it a step further by adding enhancements and customizations that can elevate your home security. One popular feature is camera integration. By connecting a camera module, such as the ESP32-CAM, you can capture images or stream video whenever the alarm is triggered. This not only gives you a visual confirmation of any disturbances but also helps you monitor your property remotely. Integrating a camera can be done using simple Arduino tutorials available online, making it accessible even for beginners.
Another exciting enhancement is the ability to access your alarm system remotely. By utilizing Wi-Fi or Bluetooth modules, you can control and monitor your system from anywhere via a smartphone app. For example, you could set up notifications that alert you on your phone whenever the alarm is activated, allowing you to respond promptly even when you’re away from home. Additionally, this remote access feature can be expanded to include controls for arming or disarming the system, adding convenience to your security measures.
To ensure your Arduino alarm system is robust against tampering, consider implementing additional safeguards. One method is to add an anti-tamper switch that triggers the alarm if someone tries to disconnect or tamper with the sensors. You might also want to explore using multiple types of sensors in tandem; for instance, combining motion sensors with door/window sensors can provide layered protection. This redundancy makes it more difficult for intruders to bypass the system without triggering an alert.
Lastly, think about incorporating backup power solutions, such as battery packs or solar panels. These options ensure that your alarm system remains operational during power outages or disruptions. With these enhancements and customizations, your Arduino alarm system becomes not just a basic security solution but a comprehensive monitoring setup tailored to fit your specific needs and lifestyle. Whether you’re a DIY enthusiast or just getting started with electronics, these upgrades will help you create a more effective and resilient security system for your home.
Maintenance and Troubleshooting
Maintaining your Arduino alarm system is crucial to ensure it functions effectively over time. Regular checks should include inspecting the physical connections of your sensors and ensuring that all wiring is secure. Loose connections can lead to false alarms or, worse, a complete system failure when you need it most. Additionally, consider testing your sensors periodically by simulating an intrusion or triggering them intentionally. This not only verifies their operational status but also helps you familiarize yourself with how the system reacts, allowing for quicker responses in real scenarios.

Another key aspect of maintenance is monitoring the power supply to your Arduino and sensors. If your system is battery-operated, keep an eye on battery levels and replace them promptly to avoid any unexpected downtime. For those utilizing home automation systems that integrate your alarm setup with other smart devices, ensure that the firmware and software are updated regularly. Outdated software can lead to compatibility issues or vulnerabilities that may compromise your home security.
Common issues may arise even with the best-maintained systems. For example, if your alarm triggers unexpectedly, it could be due to environmental factors such as pets moving around or even drafts causing motion sensors to activate. To resolve this, consider adjusting the sensitivity settings of your sensors or relocating them to minimize false triggers. If your notifications aren’t reaching your phone, double-check the code for any errors in the alerting mechanism and ensure that your Wi-Fi connection is stable, especially if your system relies on internet connectivity for notifications.
Lastly, maintaining a troubleshooting log can be incredibly helpful for identifying recurring problems. Document each issue you encounter along with the steps you took to resolve them. This record will not only aid in future maintenance but can also serve as a valuable resource if you decide to expand your home automation setup later on. By staying proactive with maintenance and troubleshooting, you’ll ensure that your Arduino alarm system remains a reliable guardian for your home.
Final Thoughts on Your Arduino Alarm System
Building your own Arduino alarm system offers numerous benefits. It not only enhances your home security but also gives you a hands-on understanding of electronics and programming. You now have a customized solution that fits your specific needs. Plus, the satisfaction of creating something functional from scratch is truly rewarding.
As you wrap up this project, consider exploring more DIY electronics projects. There are countless opportunities to expand your skills and creativity. Whether it’s integrating smart home features or developing unique gadgets, the world of electronics is waiting for you. Embrace the journey, and happy tinkering!